Showing posts with label review. Show all posts

Monday, January 21, 2013

Staedtler Lumograph & Faber Castel 9000 Pencils


I was in my local art supply shop today, and they stock the Staedtler Lumograph, a pencil I've seen recommended a couple of times.  I bought one, and here's a quick comparison with my current favourite Faber Castell 9000 (both pencils are 2B grade);

1) The Lumograph has the darker line - the Faber Castell is a noticeably lighter colour side by side.
2) The Faber Castell blends/smudges more easily - a series of vertical strokes is easily blended into a smooth patch of grey - the Lumograph strokes are still somewhat visible even after quite vigorous smudging.
3) Here, at least, the Faber Castell is cheaper (between 10 and 20 pence cheaper, depending on where you buy).

The difference between the two pencils isn't enormous, but the Faber Castell 9000 is the one I like best - it's slightly smoother, and I like the ease with which it blends.  The Lumograph seems to hold a point better, and I can see that its dark, tenacious line could be useful on occasion.


Tuesday, July 10, 2012

Zebra Sarasa SE07

I was lucky enough to win a set of these in one of Tiger Pens' monthly giveaways.

Although I use fountain pens for most of my writing, you can't beat gel pens for writing you need to dry quickly, or that you want to stand up to the elements (I use a Parker Jotter with a Parker gel refill for addressing envelopes, for example).

That leads me to a rather limited palette of blue and black, so I was pleased to be able to try a greater range of colours.

Zebra008
Ink Tests (Paperchase Kraft Notebook)

As you can (hopefully) see, the colours from the Zebra pens are vibrant and consistent.  I've included a few fountain pen inks in the lower part of the page for colour comparison.

My only slight disappointment was that the Orange pen came with a black refill - as the pens were free, I'm not going to complain about that, and I'm sure it wouldn't happen in a purchased pen.

The speed of shipping from Tiger Pens was impressive - the morning after I sent them my mailing address, the pens were waiting for me on the doormat!

The pens write pretty wet, and I was fairly convinced that this would lead to them "blobbing" at times onto the page, but that didn't happen at all.

Zebra007

A Test Sketch (Cheap Spiralbound Sketchbook)

I put them through their paces doing a quick sketch inspired by the "Zebra" name, and found them pleasant to write and draw with  - smooth (except for when I put them at too low an angle to the paper - I assume that's the "cone" aroud the rollerball tip "catching" on the paper) and the line stays consistent.  The line they write is pretty broad, but I like that, preferring a fibre tip pigment liner for *really* thin lines, and I really like the brightness of the colour.  My personal favourites are the blue (lovely and deep) and purple.  The black writes a solid, properly dark black too, reminding me a little of Herbin's Perle Noire, my favourite black fountain pen ink.  

Despite the pens being retractable, they feel solid in use, without the "rattly" feeling some retractable pens have.  The only criticism I'd make of the mechanism is that it's a little too easy to activate - my Jotter requires more pressure, and is less likely to end up ready to write when being carried in a pocket!  You could reasonably point out that it's silly to carry retractable pens in a pocket (that's why they have clips!) and I'd not disagree with you - I'm used to capped pens :)

Whilst gel pens won't win me away from fountain pens and ink, there are times when you need to write on less than teriffic paper, or write a label or address that you need to be waterproof, and these pens fill that niche for me.  Gel pens are a bit more pleasant to write with than ballpoints, and it's worth keeping one or two (or eight if you like colour and/or are indecisive :) ) around even if you're a confirmed fountain pen addict.

The pens are currently £2.34 each at Tiger Pens, meaning the full set of 8 colours will cost you £18.72 - although I've not tried them, you could also consider the Uni Ball Signo 207 RT, slightly cheaper, and a similar range of colours at £2.10 (but no pink!)

Posted via email from monkeyphoto's posterous

Thursday, December 22, 2011

Review: Black N Red Day Per Page Diary (2012)

One of the habits I've tried to sustain this year is writing *something* about my day, each day.  A diary (as in a proper diary sometimes called a daily planner, with printed dates on each page) makes this a bit easier for me - an unprinted book would doubtless lead me into the most terrible backsliding.

So far, I've used Moleskine Daily Planners (2009, 2010, pocket size - they've been surprisingly ok, given how poor the paper is in their notebooks, but are expensive) and a Ciak Daily Planner (2011).  The Ciak was a bit disappointing, with thin paper that had a lot of show & bleedthrough through for some inks.

For 2012, I bought a Black N Red Day to Page diary in the A5 size.  UK readers with decent stationery cupboards will be familiar with Black N Red, who make a series of spiral bound and casebound notebooks that are generally well regarded.  The diaries use a 90gsm "Optik" paper, and come in a range of sizes up to A4 (which seems to me to be massive - even I would struggle to fill an A4 page with my pointless wibbling each day).

Bardtp_frontcover025
The front cover - I think the "Oxford" logo is new, I can't remember seeing it on Black N Red products before.

Bardtp_frontcover026
The rear cover is rather busier, with product information, barcode, and so on.

The diary is casebound, with stitched signatures, and the cover is a nicely textured cloth over board.  The contrasting spine appears taped, although it isn't. A red woven ribbon is glued into the binding for use as a place marker.  All of the pages (save the end papers) have perforated corners, which you can remove to allow quick location of the current day (assuming you remove the corners after each day, of course).

Bardtp_page024
A Sample Page

The diary begins with a page for contact details, followed by a two page year planner for 2012.  After the planner, it's straight into the daily pages, an example of which is above. Note that Black N Red don't put Saturday and Sunday on one page, which some daily planners do to save space. At the end of the diary (the last dated page is 3rd January 2013) is another two page year planner (for 2013), a page of country information, a page of weights and measures and mileages, a page of international telephone codes and time zones and then 6 pages for notes.  It's fairly restrained in this respect, (no tube map, for example) and I quite like that, having never really appreciated the pages and pages of junk I never use that crops up at the beginning and end of some dairies.

The main diary pages have three months of calendar on the top left hand side, showing the previous month, current month and coming month.  The main part of the page has appointment times from 07:00 to 20:00, split into half hours.  Below this are "Quick Note" spaces.  (I should say that I don't use these planning features, I just write on the pages, so can't really comment on how useful it is).  Lines are dark ruled, at a fairly narrow 5mm spacing - the paper is a bright white that ink shows up very nicely on. 

The amount of writing space is slightly larger than my medium Ciak planner (much larger if one writes beyond the lines and into the notes spaces on the Black N Red pages), despite the Black N Red being a larger book.  This is because of the rather busier page layout in the Black N Red diary - I don't think it's fair to criticise that, because the product is, I think, intended to be a planner rather than a journal or personal diary.

I bought my diary from Ryman, for £9.99, although they're fairly widely available, and the price doesn't seem to vary much between stockists.

Note that I've done my ink tests on the "Notes" pages at the back of the diary - I'm assuming the paper quality is consistent throughout.

INK TESTS

Bardtp_show023
Showthrough (how visible your writing is with a blank page over it).

On showthrough, I think the diary is slightly less impressive than this scan shows - not terrible, but there is some ghosting through the facing page.

Bardtp_bleed022
Bleedthrough (how much of the writing is visible on the reverse of the written page).

It's a similar story on bleedthrough, although the scan gives a fairer (possibly *slightly* unfair) picture here.  There's a small amount of ghosting, with the beginnings of bleedthrough at a couple of points from Amazing Amethyst and Pousserie De Lune ink.

Bardtp_ink021
The written page.

Bardtp_ink021_closeup1
Close ups - the lower set of inks.

Bardtp_ink021_closeup2
And the top set.

I think the ink tests tell the best story of this paper though - compare inks like Amazing Amethyst, Pousserie De Lune and Havana Brown with their performance in previous reviews, and the superiority of Black N Red's paper is evident.  I can't make out any feathering, even from problem inks in close ups, and for that, I'll put up with the small amount of ghosting on facing and reverse pages.

IN SUMMARY

For the page count, and the cost, I think the Black N Red diary is a great buy - the paper is better than any day per page diary I've used, and it costs less than a lot of premium daily planners/diaries.  If you can live with the slightly utilitarian styling (these books always remind me of being at work, but that could just be an association I have), busy page layout, and lack of premium notebook fripperies (soft cover, rounded corners, elastic closure &c) you'll not regret getting one.

Posted via email from monkeyphoto's posterous

Wednesday, July 20, 2011

SBS Cycling Central Feed - A Quick Review

I posted this in my updated podcast listing, and thought I should talk a little more about it.  I'd intended to do a proper review, but realised that the Tour would end before I wrote that, so I'm dashing this off instead.

Essentially this is a feed with three podcasts on it - there are regular stage updates, about three minutes long that just recap the result and GC.  There's also the Sag Wagon, a daily 30 minute show, and interviews (usually conducted by Anthony Tan).

The Sag Wagon is the one I wasn't sure about in my podcast listing.  It is an odd format, most of the talking is done by host Sam Pang, a journalist whose background is football, olympian Dave Culbert (who I'd assumed was a cycling olympian, but was actually a long jumper),  and a cycling journalist, Sophie Smith, who is deferred to when results, stats &c are needed. 

I have to say, I'm warming to the Sag Wagon - it is flippant, but it's more good natured than my first impressions of it suggested, and I like the interplay between the hosts.  Is it the place to go for incisive post race analysis? Probably not, but it's good fun, and I'm now looking forward to their intermittent features (Chateau of the Day, the Battle for the Lanton Rouge, Where Did Tony Martin finish today, and so on...).

If you're of a serious frame of mind, the interviews will make this feed well worth adding to your podcasts.  You might remember Anthony Tan as a somewhat, er, disruptive presence on last year's Cycling News tour podcasts.  He's far better in charge of the microphone, I think, and worthy of particular note are his interviews with Colombian journalist Luis Barbosa, author and journalist Richard Moore, and Cycling News' Dan Benson.

In short, I think my first impressions of SBS' Cycling Central podcast offerings were wrong - add the feed and see what you think.

Posted via email from monkeyphoto's posterous

Thursday, March 17, 2011

From Pen Addict: Review: Noodler's Antietam ink

This review is by Kalina Wilson, who can also be found at geminica.com.

Antietam (pronounced something like an-TEE-dum) is not one of the more frequently appreciated colors of Noodler's ink, but I'm a big fan.  This ink is generally described as looking "antique" or like dried blood. It caught my eye while searching for a rich, red-tinted brown, and it fits the bill very, very well.  

This particular color of Noodler's isn't widely available but right now it does appear to be stocked by both Writer's Bloc and Goulet Pens

Antietam sample

DSCI0003_0427


Because the color has such strong shading, it changes a lot depending on what you're using it with - your paper and especially your pen make a huge difference.  In general, the thicker it is laid on and the less absorbent your paper, the more the ink moves towards an extremely rich deep red.  A lighter layer can look like rich orange or thin tomato, depending on the paper and pen.  Some paper pushes it towards brown.

There's some lovely art in this review too, well worth reading further.

Posted via email from monkeyphoto's posterous

Thursday, March 10, 2011

Nomadic PE-10

FAIR WARNING:

This is a post about a pencil case.  No really. If you follow this posterous/tumblr/blog for my tedious ramblings on cycling, photography and art, this may not be for you.

Nomadic are a Japanese company that makes a bewildering array of pencil cases, electronics cases and bags, with interiors that allow you to organise the stuff you're carrying to varying degrees, and according to your preference.

WHY?

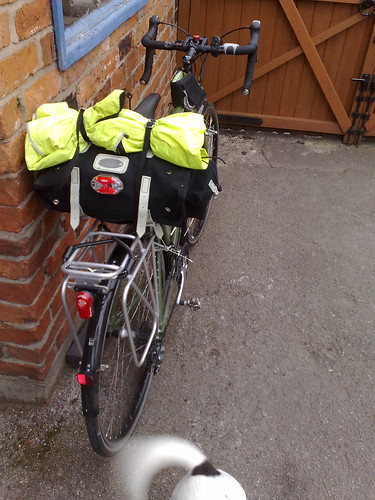
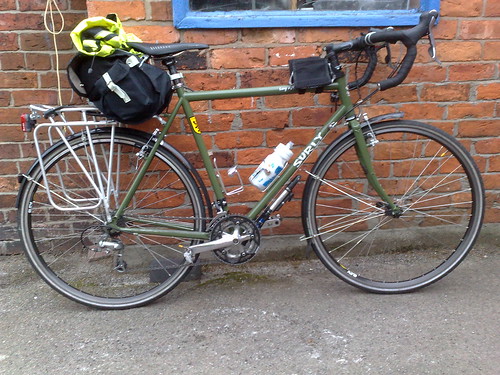
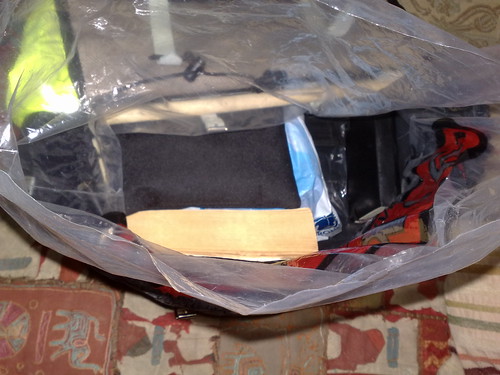
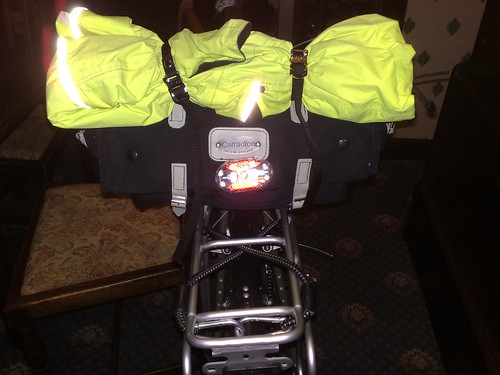
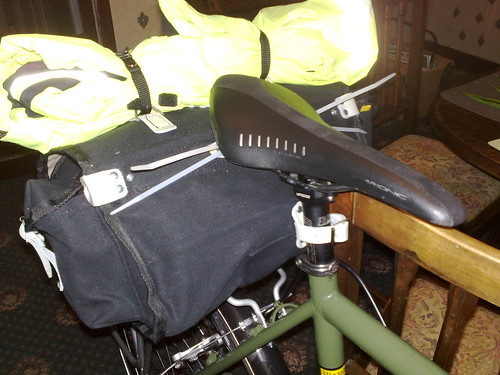
I've been carrying my writing stuff to work in a "pouch" style case, and latterly in the pen slots of my rather nicely designed Brompton "C" bag.  On the "normal" commute, I use a Carradice saddlebag, which is brilliant, but lacks any internal organisation at all.  With this bag, I use the aforementioned pouch style case, and having everything lumped in together led to some distressing scratches on my Rotring Esprit pen.

On switching back to the "normal" commute, this year, and thus the Carradice saddlebag, I figured I needed a better solution for organising things in the bag.

WHAT?

08032011254
The Nomadic PE-10, Closed

Nomadic's PE-10 "Tri Fold" case (sometimes called the "envelope" case) seemed like the best bet for me.  Try as I might, I couldn't find a UK supplier for these (note to UK suppliers - you could CLEAN UP selling these things here, they are BRILLS) so mine is from online stationery emporium "Jet Pens".

HOW?

08032011255

The Nomadic PE-10, Open. Note the velcro strip down the side - the case closes VERY securely.

What appeals is the way everything can be given its own slot - no nasty scratches or fumbling about in the bag for me anymore!  The case also unfolds to lie flat, so everything is ready for use and nicely organised.

In the pen slots are:

Back Row, (L-R);

Staedtler Mars Micro 0.9mm mechanical pencil (but Staedtler lead is horrid and squeaky - use Pentel).

Lamy Safari EF fountain pen filled with Lamy Blue

Schneider Base LH fountain pen filled with Diamine Imperial Purple

Parker Jotter Ballpoint (with a Parker Gel refill in black)

Parker Jotter Fountain pen (although mine is the Stainless Steel "flighter" version)  filled with J. Herbin Perle Noire

Parker Jotter Mechanical Pencil (0.5mm)

Front Row (L-R);

Rotring Esprit (nifty telescopic fountain pen, now sold as the "Parker Esprit") filled with Diamine Monaco Red

Worther Shorty Clutch Pencil (3.15mm lead) black

Worther Shorty Clutch Pencil (3.15mm lead) blue

Why so much? Well, at least partly for redundancy, should one pack up, I can switch to another. The fountain pens are there principally for the different colour inks, which help me make sense of my to do lists (I'm naturally horrendously disorganised, and my life would fall to bits if it weren't for writing things down, and Mrs Monkey, of course). 

Pressure of space means that my planner of choice (a Filofax) is in the "Pocket" size, making an "F" or "EF" nib (like that on the Lamy) essential for effective use of the page.  "F" and "EF"s are a bit small and scratchy for meeting notes though, so for those I tend to use the Jotter fountain pen.

The mechanical pencils are for planner entries not quite definite enough for ink (the Jotter, mainly for this) and the others for sketching, should I get chance.

The ballpoint is for addressing envelopes, writing on "proper" ink unfriendly surfaces, and occasional "do you have a pen?" loaning - people really don't like borrowing fountain pens, I find.

Whilst there's nothing in there to set the pen afficionado's heart a flutter, they're all super reliable "workhorse" type writers, that'll start without needing a minute of scribbling on scrap paper, and not dry up in between making notes.

The pen slots aren't the whole story of the PE-10 though.

08032011256

Pocket 1 - Behind the Left hand Pen Slots

Behind the left hand side pen slots is an top opening pocket that extends about 3/4 of the height of the case.  I use this for spare cartridges, and "Post It" note tabs (these are fantastic little things, I use them for marking items of significance in books, diaries & planners, and as dividers in the "notes" part of my Filofax).  This pocket doesn't have a closure, but I've yet to find that anything has "escaped" from here.

08032011257

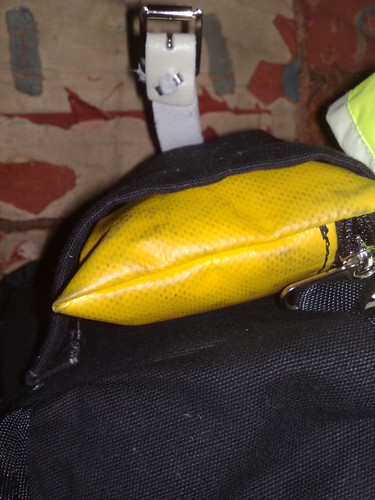
Pocket 2 - at the top of the middle section of the case

At the top of the middle section is a small pocket, closed by a velcro strip.  This is just about large enough for a small Staedtler Rasoplast eraser, and my SanDisk USB MicroSD card reader.

08032011258

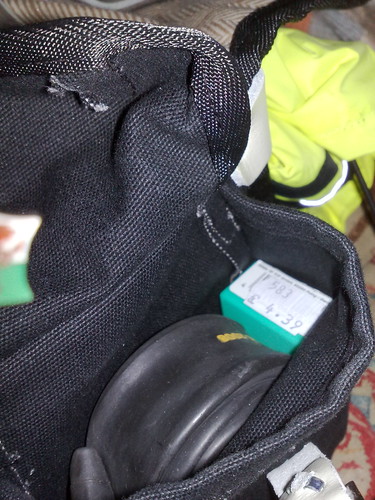
Pocket 3 - behind the middle section's pen slots

Behind the middle section's pen slots is a full length "slot" type pocket - I don't keep much in here beyond a usb key and my headphones.  I'd really like this pocket if it had a zip closure, and/or was wide enough for a Rhodia 11 pad (it isn't *quite* there, sadly).

IN SUMMARY

The PE-10 is great - a very practical way to organise my stuff & keep it safe, and I've not had the problems others have described with losing items from the case (although all my pens have pocket clips, and I do use those to clip to the case's slots).  It has the advantages of a pen or tool wrap (separating your pens so they don't scratch each other and can be organised), with an unfussy closure and some useful extras (like the pockets, and pen slots that are different sizes - Parker Jotters being slimmer than Lamy Safaris, or Worther Shortys).  The material is a tough "ripstop" nylon, the stitching is nicely finished, and the overall impression is of solid build quality.   Although the case isn't padded, using the "slot" pockets (and putting the right things in them) should provide a degree of protection to the pens & pencils inside when the case is closed.

For perfection? Make that middle slot pocket a smidge wider, and zipped, and get a UK/European distributor!

A NOTE ABOUT LINKS

Provided on the off chance that you're interested in the things I talk about here - I have no affiliation with the companies linked to, and will get no kickback from them if you purchase.  However, I have used these companies, recieved good service, and wouldn't hesitate to recommend them to you. 

The items I describe may not have been bought from the supplier in the link (some were bought in actual shops, many years ago, some came from eBay), but were all paid for by me long before this review was even a glimmer of thought in the back of my brainium.

Posted via email from monkeyphoto's posterous

Friday, October 15, 2010

Cyclocosm: How The Race Was Won – Paris-Tours 2010

Anyone else out there tired of talking about doping? How about taking a look at a few races contested by the type of rider who apparently never needs to dope? I’ve been out of town for the past two weeks, but am finally catching up on the late-season classics, and so (turning a blind eye to Danilo Hondo’s fairly significant role), here’s a How The Race Was Won on Paris-Tours 2010.

Cyclocosm's "How the Race Was Won" series is back with a review of Paris-Tours 2010.

These really are excellent - follow the links to Cosmo's blog, and to subscribe to his podcast via iTunes.

Posted via email from monkeyphoto's posterous

Thursday, June 10, 2010

Shutt Velo Rapide Shorts - Review

FIRST THINGS FIRST
My "first look" at the Shutt VR Standard bib shorts is here. It's probably worth reiterating that I paid for them, and got no discount or special treatment you couldn't get yourself (see the "First Look" post for full details).

THE PREAMBLE
A couple of weekends ago now, the weather finally cleared enough for sane people to consider doing their morning rides in shorts. Having let my Shutt standards sit in the wardrobe for a couple of weeks since purchase (I was back in 3/4s, as it had mostly been perishingly cold) I was keen to give them a proper test, and decided on my favourite 60 mile route as the ideal first run.

Since then, I've also worn the shorts for a commute, and this review is based on those experiences.

WORN
Pulling on the shorts, two things are immediately apparent. The first is the quality of the lycra they're made out of - it's a nice, satin touch material, not the wet feeling shiny stuff we're used to in cheap shorts.

The second thing is the length, or rather, the shortness of the leg. I have to say, I like this. we will talk of it more, but Mrs Monkey (not given to flattery) remarked that it was a very fetching look, and I approved too.

Once the bib is donned, another thought springs to mind, and that's that the sizing is small-ish. At this point, I'm not overly concerned - all bib shorts work best when in the "on bike" position rather than stood up straight.

RIDDEN
One thing is apparent as soon as I set off, and that's that that nice cushy pad we discussed in the "First Look" at these shorts isn't all show in any way. The Pro-Logo Nago PAS saddle is a stern challenge to any pair of shorts, and the ShuttVR standard's pad does a great job of taming it. It's not a complete job, but the Shutt standard bought me some time in the saddle feeling mostly comfortable that my other shorts haven't.

The length (or shortness) of the leg is another thing that you notice too. The closest thing I can think of to this is the experience of wearing white trainers - there's a period where you're constantly catching sight of your feet, and for a split second thinking "GOOD GOD!" and then remembering what they are. This is how you will feel about your thighs for a little while in the Shutt Standards. Rest assured, it's a good look, trust Mrs Monkey.

Unfortunately, the smaller sizing became apparent as well - I think, for my next pair, I'll go with a size XL. In my case, the size L is near, but the bib isn't quite long enough for me. As a result, I ended up with some of that lovely padding in an area that, let's say, did not require it, and some adjustment was needed from time to time to relocate the pad. Oddly, this was more apparent on the commuting ride (I guess because the ride is more stop/start, and my position on the saddle changes more) than on my 60 miler.

I must also mention the mesh back and straps - I was surprised at how much difference this makes to long ride comfort. It was hot on the 60 mile ride, and my Nalini shorts would have been pretty hot & sweaty at the back. The mesh of the Shutt Standards did a great job of dispersing this heat and sweat.

IN SUMMARY
The best shorts I've ridden in so far, and better than anything else I've found in the price range. For £29 plus postage, you get a really comfortable pair of shorts at a price equivalent to pairs with less comfortable pads, less comfortable lycra, and lacking nice features like the mesh back and straps of the Shutt standard.

Be aware of the short leg (to avoid a stripey bike tan, don't start wearing them mid season if you've previously worn longer shorts ;-)) and the smallish sizing (think dhb sizes, which run small too).

VITAL STATISTICS
I am 6'2" tall, 33" leg (pants inseam) and have a 32" waist.

The shorts reviewed are the Shutt VR Standard bibshorts, in size L.

You can read my "First Look" at the shorts (with pictures of the pad &c) here.

Saturday, May 22, 2010

Review - Fi'zi:k Bar Gel / Microtex Handlebar Tape

Another recycled bit of my content from Cyclechat, I'm afraid.

Bought From Ribble Cycles
Price: £16.95

This tape/gel kit was bought to replace the tape supplied on my Giant SCR2.0 when I bought it. The tape originally on the Giant is a plastic foam type tape - cushy, and quite squashy, but not terribly nice under the hand (plasticky in feel).

Having been impressed with Fi'zi:k's products already (the Arione saddle being one of my favourite things ever) I decided to buy their bar tape to replace my OEM tape.

First Impressions:
The tape arrived quickly from Ribble, and this set consists of 4 pads of "technogel", which sit under the tape (2x curved pieces for the bar tops, 2x straight pieces for the drops), two rolls of microtex tape, a couple of short pieces to cover the brake lever clamps, two end plugs and two finishing tapes.

The microtex material looks and feels a bit like suede, and the rolls of tape have short sections at the beginning and end that are plain, thereafter the tape has rows of perforations. The tape is described as "thin" by Fi'zi:k, and bad memories of the electrical tape like bar tapes of the eighties led me to choose the gel + tape set. I have to say that on examining the tape, the thickness of it seems to me to be more akin to a cork type tape, with a thicker (if not exactly fat) section in the middle. Were I choosing again, I'd feel a bit more confident about going for the tape alone.

The end plugs are plain black with an embossed ":K" logo (the bar tape is black in this set) and the finishing tape is black with a repeated fi'zi:k logo in silver printed on it).

The technogel pads can be cut to size as required, and are, apparently, reusable (they can be washed in soap and water to restore the tackiness of the underside, and stuck to the bars again).

Fitting:
The technogel pads go on first - on my bike (a large frame, presumably meaning wide bars too) the straight technogel pads were large enough to cover from the lever clamp down to the end of the bars quite easily. On the tops, fitting of the gel was a bit more problematic, with the curve of the gel pieces not quite the right fit for the bars. fortunately the gel is quite malleable, and can be pulled into shape as required. The adhesive on the back of the technogel is tacky rather than sticky, so I used electrical tape to hold the pieces in place prior to wrapping.

The bar tape pieces for the brake lever clamps were generously sized, and had to be cut down slightly so as not to interfere with the pegs on the inside of the hoods that help keep the hoods in place (Tiagra shifters). These pieces needed to be taped as well, as the adhesive on them isn't quite strong enough to keep them in place while wrapping. With hindsight, I wonder if a better option here might be to cut a hole in these pieces to allow the peg to go through the tape, as the shorter tape pieces don't grip the lever bodies very well.

The main rolls of tape are generously sized, and I'd estimate that they could easily have wrapped my bars right up to the stem clamp, even over the gel. The tape stretches well, and seemed to hold up to repeated unwrapping and rewrapping excellently. (Having only wrapped one set of bars in the past, I inevitably went the wrong way on one side, didn't notice a gappy bit by the curve of the drops etc etc).

One of the tape rolls seemed to have a defect in the application of adhesive on it's reverse side, in that whilst peeling the backing off, the adhesive strip was removed as well. (for about 8-10 inches of the tape). This didn't affect the wrap (it was possible to continue) but was slightly disappointing. Again, the strength of the adhesive seemed nicely judged, strong enough to hold the tape in place during the wrap, but not so strong as to damage the tape if removed to rewrap.

The method used was the "self tightening" method from Park Tool's web site. To finish the tape, I used black electrical tape at the stem end, with the tape edge melted slightly using a heated screwdriver blade. (Be careful doing this!) Fi'zi:k's finishing tape went over the top of that, again with the edges melted slightly. Melting the edges seems to stop the tape edge from peeling back, which can happen after use.

On the Bike:
The feel of the tape itself is very nice - the suede like finish of the microtex feels secure and nicely grippy. The gels seem to absorb vibration without being squishy in feel, and overall, this is an improvement on the OEM tape on the bike. With hindsight, I think I'd not fit the bar top gels if I was to do this again, but then I don't ride on the tops/hoods much at all.

The gels and tape can be bought separately for around £12 and £9 respectively - the set I bought including both has black tape only, although more colour options are available if you buy the tape separately.

Links:
Ribble Cycles - Bar:Gel Handlebar Tape Kit
Park Tool Drop Bar Wrapping Guide
Bicycletutor Drop Bar Wrapping Guide

Thursday, April 29, 2010

Shutt Velo Rapide Shorts - First Look

THE RAIN
You can blame me for it.

I'd decided to buy some new shorts, as I couldn't face Summer in my SPEG seconds again. (These had been cheap, discounted because some customers had found the pad uncomfortable - sadly I was one such customer. My experience was that the pad was not so much "uncomfortable" as "abrasive", you try that for 60 miles).

Two weeks of good weather convinced me that shorts season was nearly here, even for the early morning cyclist. My one good pair of shorts (Nalini six panel, we do not push the boat out here at Monkey Towers) clearly needed supplementing.

So I made my decision, placed my order, and the shorts arrived on the day the sun got shy, and disappeared behind those grey clouds.

THE FULL DISCLOSURE
I like Shutt Velo Rapide. I like their philosophy (British made & sourced where possible - for lefty, low carbon reasons, as well as supporting a general idea of manufacturing things here) and I like them - they're on twitter, active on facebook, and engage like anyone else as opposed to seeming to be there to push product at you constantly.

I am not in their pay, and received no special treatment, and no discount on my purchase that you couldn't get yourself (sign up at their Clubroom page for one such handy money off code).

THE SHORTS
As I said, at Monkey Towers we do not push the boat out. There are no Assos shorts lurking in the bike stuff drawer, and Castelli have yet to grace my form. I do own a Rapha cap, but this is because hardly anyone makes Winter caps with peaks anymore, for reasons that I am unaware of. Whilst we draw the line at the stuff peddled by certain continental supermarkets[1] , we are not averse to, say, the second least expensive item in most online stores. and yes, for shorts, they have to be bibs. Waist shorts are rubbish, you know it and I know it.

Fortunately for me, Shutt offer an alternative to their Pro Bibshorts, in the Standard Bib Short, and it's these that I bought. (Which is not to say that the Pro Bibshorts don't offer value for money - but we'd spend that sort of money on one of Shutt's excellent sportwool jerseys. If we had that sort of money right now).

THE ORDER
Lore has it that bibshorts are sized according to waist measurement - you match this & order accordingly. (Somewhere between a 32" & 33", depending on how much chocolate I've felt necessary for recovery in the week of measurement, since you ask). This places me in the "L" size, confirmed by a couple of brief conversations via facebook comments. (Shutt's facebook page is here).

The order was placed on Tuesday lunchtime, and had been delivered by the same time Wednesday. Excellent service.

Branding is understated & classy, consisting of this ShuttVR ribbon on the thigh If you like your shorts to have the manufacturers' name emblazoned across your backside, these are not for you.

THE SHORTS II
Shutt Standard bib shorts on the left, Nalini six panel shorts on the right. Nalini shorts are a size 4. Shorts are similar across the waist, but you can see that the bib and legs are shorter on the Shutt Standard.

Compared to the Nalini six panel (size 4) the Shutt shorts have a shorter bib/shoulder strap, and slightly shorter legs. (This has led to them being christened the "Sean Yates" shorts, according to the website).

The Shutt Pad (left) and dhb's pad (from the "Merston" bib 3/4s) The shutt pad is larger in all dimensions, and thicker.

The pad is streets ahead of the Nalini one. It's bigger (extends forther forward and back, is wider, and seems plusher) than my current favourite, the pad in Wiggle's dhb branded 3/4 bibs). The real test of the pad will be some rides on the Pro Logo Nago PAS, a saddle that pushes the boundary between "firm" and "oh my christ this is utter bloody agony" like no other I've ridden. If the Shutt Standard can tame that beast, they will have been worth every penny.

The lycra in the Shutt standard is nicer to the touch than the Nalini lycra (softer in feel, and seems stretchier) and the mesh back will, hopefully, make them cooler than the solid backed Nalinis.

Which will be nice, if the sun comes back.

Ride report will follow, because we have to get a summer this year, don't we?

Ride Report now here.


[1] Although, if we're honest, this is at least partly because of the frankly bizarre sizing scheme employed. The shorts from such places would fit a cyclist built along the lines of "Big Daddy", not a spindly monkey like myself. Or anyone who wasn't a Saturday afternoon wrestler. Just saying.

Tuesday, September 29, 2009

Mine's a Priscilla

On the Bike, Dog in Attendance
My Carradice Lowsaddle Longflap, on the bike with a happy dog in attendance.

My Carradice Bag, that is. Inside, on the label, is written the name of the person who made the bag, in my case, Priscilla. The desire for an old fashioned saddlebag for my commuting bike grew out of the realisation that my panniers were a less than ideal solution. Using two results in a bike that's hard to manoeuvre on and off the train (and with panniers barely half full). Using one results in a bike that handles oddly - not unrideable, but I didn't like it.

The solution seemed to me to carry the load centrally on the back of the bike. Given that my panniers are 20l capacity each, I figured a 10-15l saddlebag would provide enough space for most of my commutes.

I'd discounted rack bags because they tend to top out around the 10l mark in capacity, and I have to admit that I liked the idea of a traditional, British made product like the Carradice saddlebags for a bike like my Long Haul Trucker - the ethos seemed to fit, to me.

I considered the Carradice Barley for a little while (often recommended as a commuting/day ride solution) but worried about the days I'd need to carry a bit extra. (Good job, as it turned out, the Barley would have been way too small for me).

My eventual choice was the Nelson Longflap, and I asked my local bike shop (Manchester's Bicycle Boutique) to order one for me.

An ordering mix up meant that I actually ended up with the Lowsaddle Longflap (similar dimensions to the Nelson, but slightly less high to account for bikes with less clearance between saddle and tyre/mudguard/rack). This turned out to be something of a happy accident, as the bag rests nicely on my rear rack.

On the Bike #1
On the bike, using the "Longflap" closure - this allows the carriage of slightly more stuff.

So how did it manage with a typical commute's luggage?

Bag Interior, Packed For Regular Closure
Packed for a normal commute - will be closed without the longflap

The picture above shows the interior of the bag. This is what I'd carry most days - a book to read on the train, moleskine pocket notebook and diary, and work clothes. The space left is where I'd put my lunch most days, and the bag liner is the bag that the Lowsaddle saddlebag came in (handy that). With all this in the bag, it can be closed using the "normal" closure without problems.

On the Bike, Regular Closure
Packed for a normal commute and mounted on the bike - closed without the longflap here

There isn't room for my waterproof in the bag (actually, there probably would be if I laid it on top of the contents and did up the flap over it. Hmm). In the pictures it's secured to D rings on the top of the bag using toe clip straps - I think it provides a helpful bit of extra "hi vis" for following traffic, by coincidence. The light loop on the flap is occupied by a Torch9x light which has an integral reflector. (It supplements a rack mounted Smart Superflash light for rear visibility). With the bag hanging at its natural angle, the light faces rearward in just the right position. (I believe some people press the nice metal Carradice plaque into service for light mounting where the angle of the bag is not right for the light loop to be effective).

Right Hand Pocket
Right Hand Pocket

Outside the main body of the bag are two side pockets. Carradice lore suggests that these will spill small items (because of the flap closure, and angle of the bag). In the right hand pocket, I have a spare inner tube (Continental Touring 28-35, from memory, fact fans) and a Rema Tip Top touring puncture repair kit. Both fit nicely, and are large enough not to unexpectedly depart the bag.

Left Hand Pocket
Left Hand Pocket

In the left hand pocket is a Bagaboo tool pouch - this holds another puncture repair kit, tyre levers, my multi-tool, cable ties, chain quick link &c &c. The bagaboo pouch is a tight-ish fit, but not so much as to be awkward. My pouch is the truck tarp version, so should be waterproof enough to survive this location in a downpour. (The cotton duck material of the saddle bag is waterproof due to its close weave and proofing wax, but can transfer moisture from its internal surface, apparently).

What about when I needed to carry more? It's here that the "Longflap" closure comes into play. Essentially this is a piece of extra material that tucks under the flap used for the "normal" closure of the bag (when not in use, it's held in place by press-studs). It sports an extra set of straps for closing the bag over a larger load.

Bag Interior, Packed for Longflap Use
Bag Interior - Packed for use with the "Longflap"

As shown above, the bag has an 800g sliced Rye loaf, work shirt & underwear, paperback (H.P. Lovecraft's "Haunter in the Dark" omnibus), lunch box, moleskine pocket notebook and diary inside.

On the Bike #1
on the bike, closed using the "Longflap"

The photo above shows how the longflap closure looks on the bike - notice how it makes the bag slightly taller. The photo at the start of this post shows a rear view, and a clearer view of the extra straps on the longflap in use. The drawstring closure inside the bag is large enough to cope with the bigger load too, meaning that it isn't exposed at the sides.

The only thing I'm less than happy about at present is my mounting solution for the bag. I've gone with the infinitely useful cable tie, for the time being.

On the Bike, Cable Tie Bodge
Cable Ties for Saddle Loops

The cable ties go around the saddle rails, and the bag straps go through these (buckles inside the bag, as any fule kno). Despite this giving the saddle a whimsical, whiskery look (a bit like a cartoon mouse), I suspect the edges of the ties will not be good for the leather bag straps, so will be looking to change this mounting method fairly soon. (There's tons of ways to do this, from the fettling heaven of Carradice hackery, to the clamps and racks and bits supplied by Carradice themselves).

I love the bag so far - build quality is great, and it seems, up to now, to be ideal for my purposes. It isn't terrific on the Arione saddle, because the back of the saddle extends a fair way over the bag, but I've not had problems accessing or repacking my stuff that outweigh the positives of it. (The inconvenience amounts to reaching slightly further into the bag under the top flap - not too onerous). The feel of the bike is far, far better than with my old, single pannier solution too.

Useful Links:
Carradice Website
Wallbike's Carradice Hacks
Peter White Cycles' Carradice Page (far better pictures than on Carradice's Website, and lots of useful information).

Thursday, June 11, 2009

Review - Howies (Timbuk2) Messenger Bag (Medium)

Bought from Howies.co.uk
Price Paid: £30, shortly before they were reduced again to £24 :/

Addendum: Howies' collaboration with Timbuk2 seems to have ended, and they now offer two self branded messenger bags, the Chevron Bag, which is a really interesting idea (I'm not sure the reflectives are quite right for traffic behind though), and the gorgeous Hand Me Down bag, which costs a fair amount (to say the least) but is built to last forever.

The bag I review here is essentially the Timbuk2 meduim, so hopefully the information is still of use.

I ride a commute that consists of two cycling parts (2 and a bit miles, 12 and a bit miles), with a train journey in between. I'm generally carrying work clothes, something to read, waterproofs etc, and found the load space of a rucksack a bit inconvenient at times (essentially tall and narrow, meaning that if you packed the thing you want under the waterproof, a degree of unpacking is necessary).

The courier bag appealed because of the wide, shallow load space - in theory, this means I can get to things without unpacking other things. It struck me that it might also be a more convenient place for my train ticket etc, given the ability to access the bag while wearing it.

Timbuk2 messenger bags seem to be reasonably well regarded by commuters, and the chance to pick one up at a lower price than the somewhat eyewatering £80 RRP was too good to pass up, even though the Ltd edition one does look slightly like it's made out of '70s curtains. (Sorry Mr Oakley).

First Impressions:
The bag is very well made, and under the cotton duck outer is a solid looking waterproof liner. The main load space contains a good sized organiser pocket (more than enough room for spare tubes etc) that consists of pen slots, a large zipped pocket (which contains patch type pockets (I put my tubes in those), smaller zipped pocket, and a clear, id type pocket (which seems a bit useless to me, as asking someone to peer into your bag to see your license/security pass etc is, well, odd). On the outside, you have one decent sized zipped pocket (under the main flap when the bag is closed) which has a pocket without a closure behind (good for wet gloves, for example).

The bag arrived from Howies in good time, and ordering & delivery was straightforward, as it has been every time I've used them.

In use:
Well, the bag swallows up a deceptively large amount of stuff - I used it on a short shopping trip when it first arrived, and was able to cart a boxed DAB radio, and two boxes of washing powder home in it. My commuting gear goes in very easily, and I suspect I could carry a pair of shoes in addition to all that without really stretching the bag at all.

It is important to remember that the back of the bag is unpadded, and as such a degree of thought is needed to pack it so that you aren't tormented by stuff digging into your back throughout the ride. The main carrying compartment is one space too, so you need to give some thought to whether things will slide about in it.

It also may not be suited to the lower position of a racing bike - unless the bag is packed exactly right, it will inevitably slide one way or the other across your back, and seems to need constant readjustment. Again, the key to this is packing properly, but this particular pack is one I manage to do once a week at most, it seems. I suspect that a more upright riding position (on a flat bar bike, or the hoods of a drop bar bike) would make this far less of a problem. More burly riders may also find that less of a problem, as the stabilising strap may sit better for them. (I find it doesn't go quite high enough up the main strap, personally, and would be better if it could be fitted over the shoulder pad).

In Summary:
Solidly built, huge carrying capacity, but expensive at RRP, and may not be ideal if you ride head down a lot.