Monday, August 31, 2009

A Tiny Tour: From Crewe to France and Belgium, Day Two

Mrs Monkey at the Start of the Route #2
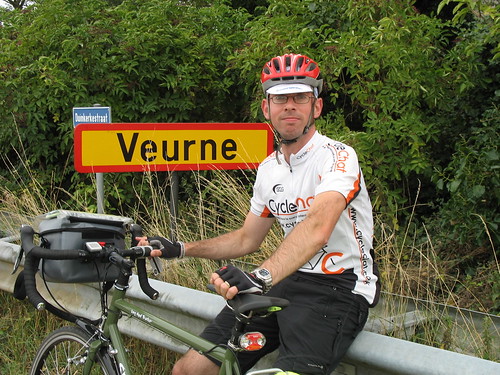
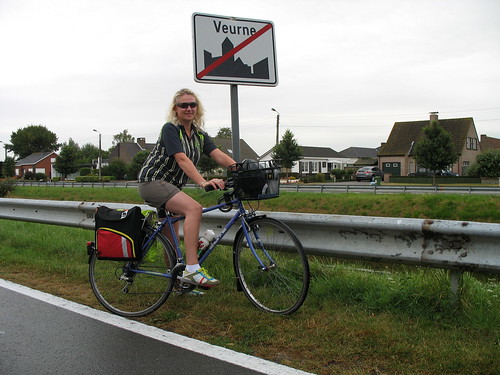
Mrs. Monkey at the outskirts of Veurne

During the night, the slight disadvantage of a hotel on the road around Veurne became apparent. In Belgium, it seems, people discuss parking their BMW X5s in tiny spaces in VERY loud voices at midnight. Garbage collection is also done by VERY noisy trucks during the wee small hours of the morning. Closing the window largely resolved the noise problem though.

Westhoek Kajakclub
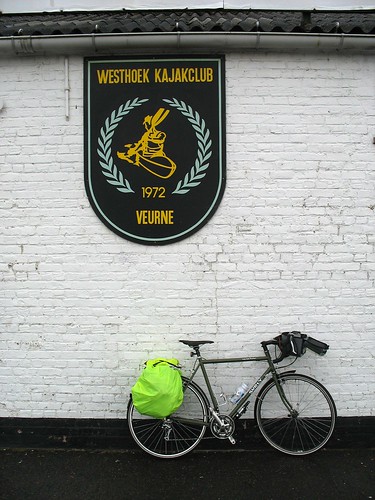
Westhoek Kajakclub, where we joined the canal side route out of Veurne

Our plan for today was to strike out towards Brugge, using the route along the Canals (Kanal Veurne Nieuwpoort, Kanal Passendale-Nieuwpoort, Kanal Gent-Brugge-Oostende). Navigation from this point was straightforward, using the excellent system of "knoppunkten". Rather signpost numbered routes, a la the NCN in Britain, the Fietsroute system in Belgium employs a series of numbered points. Using your map, you decide which points to follow to your destination, and then just follow the signs between them. The signs are intelligently placed and easily interpreted. It's a system that works superbly, and both Mrs. Monkey and I became big fans of it during our tour.

Mrs Monkey and Friends
Traffic on the Fietsroute

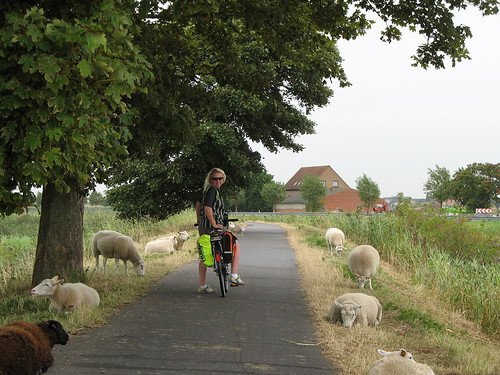
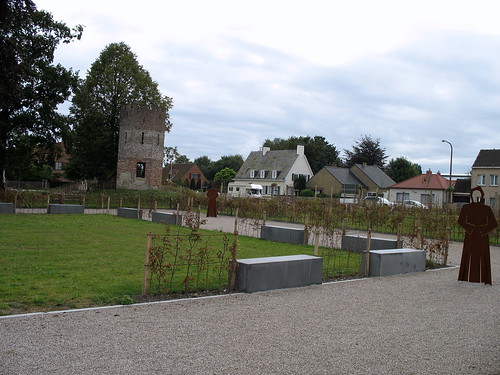
As you'll see from the pictures, the day began a little overcast, and we did get a shower around midday that was heavy enough to require 5 minutes or so sheltering under a tree. Along the way out of Veurne, we encountered these sheep, and this unusual path side tableau;

A Pathside Tableau
Flat Eric has a Deadline to Meet

We also saw a pedal pub, although this was, unfortunately, on the other side of the canal to us, we couldn't take up the occupants' enthusiastic offers of drinks! Another sight we saw for the first time along this part of the route was the large, guided rides that seem to be an everyday occurrence. I'd estimate that about 20-30 people, mostly seeming to be in their 60s, led by three or four people in Hi-Viz tabards were headed towards Veurne along the fietsroute. We were to see these groups pretty much every day, along with training racing cyclists, and commuters (the latter more common the closer we were to towns).

On the Veurne - Brugge Canal
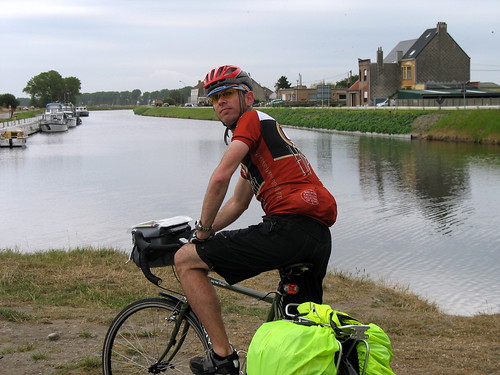
Me, where the route turns towards Brugge

After turning towards Snaskerke and Oudenburg, the day began to brighten, and we stopped just over one of the bridges on the canal at the "Bistro Nieuwweg" ("New Way Bistro"). I don't think we'd have spotted this place had we not been cycling (it's seriously out of the way).

Bikes
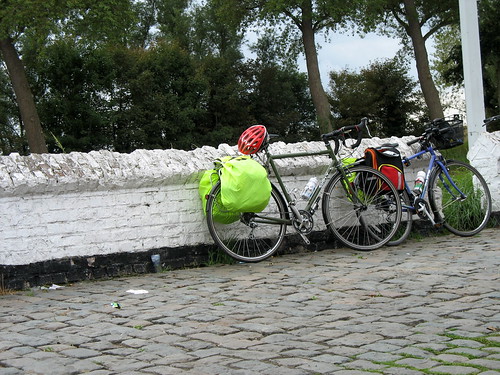
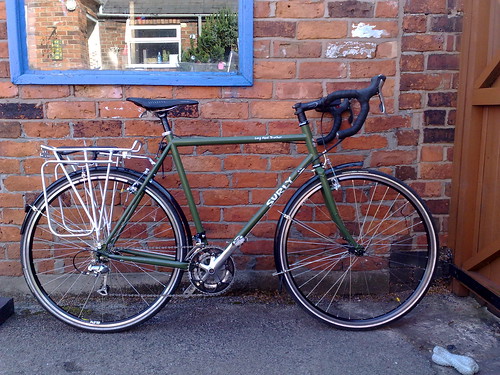
Our Bikes at the Bistro...

Parking
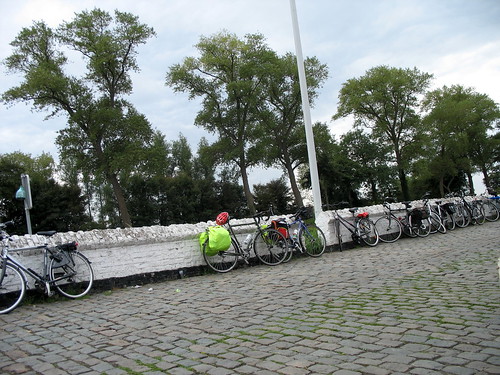
And Our Bikes in context.

As you can see from the pictures, most of the other patrons had arrived by bike too - generally (and the folks at Amsterdamize/Copenhagenize would be proud) on city bikes, helmetless, in "normal" clothes. Here, the bikes outnumbered the parked cars by around three to one. Had another guided group stopped (one passed as we were enjoying a Kriek and a Hoegaarden) that would have risen to ten to one. You can also see our first taste of Belgian pavé here. We were to become more familiar with this on day three...

Oudenburg

We did make a stop in Oudenburg, but found that a lot of places had already closed. We stopped at a quite swanky restaurant, and felt so out of place among the suited clientele that we left having only had a drink. Eventually, we happened across a small bakery, and I used my (frankly limited and dreadful) Dutch to order us a couple of sandwiches (which were delicious, although I couldn't figure out what was in them) and pastries to sustain us for the rest of the journey.
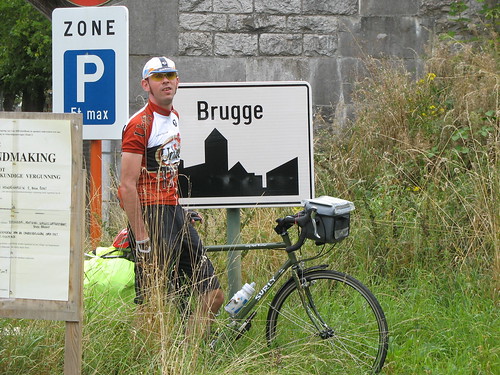
Arrival at Brugge
Arrival at Brugge

If I look somewhat uncomfortable in the picture above, it may be because I'm trying not to stand in the trash surrounding the foot of this sign. Once in Brugge, we used my Nokia N82's GPS navigation system to find where we were staying, the B&B Marie Rose Debruyne, on Langeraamstraat. This is a really well situated B&B, handy for the centre of Bruges, and run by lovely, friendly people. (As we left, they were 'phoning the train station at Zeebrugge to find out for another guest whether left luggage lockers were available). The house was designed by the proprietor, and is unusual architecturally, but comfortable and friendly (super breakfast too). One word of warning is that the numbering on this road is slightly confusing - you may need to use your (frankly limited, and dreadful) Dutch to get directions.
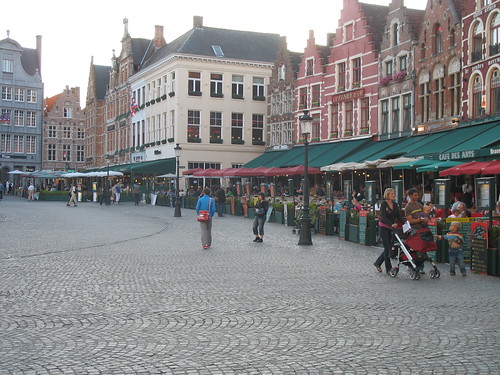
Grote Markt, Brugge
Brugge Grote Markt.

Brugge itself is wonderful, and bikes are EVERYWHERE. The "Uitgezonderd" exceptions for bicycles and mopeds to the one way system are ubiquitous, and the world has not stopped turning, nor does there seem to be the daily carnage that opponents to such systems seem to predict. As you can probably see from the pictures, the evening we were there was lovely, sunny and warm.

Horse Drawn Carriages, Brugge
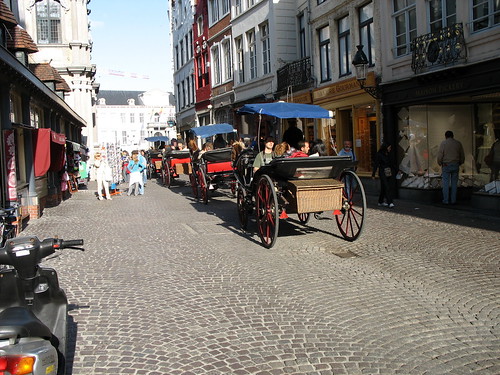
The ubiquitous Horse Drawn Carriages...

Brugge Bike
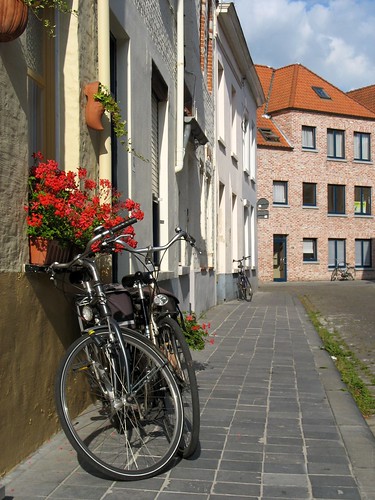
...and even more ubiquitous bikes.

Dinner on this night was in a "Tante Marie" restaurant just off the Grote Markt. More pasta for Mrs Monkey, although I tried a Vlamse Karbonade (Flemish Stew) which was very tasty indeed.

Miles Covered: 34, at an average speed of 10.18mph

Sunday, August 30, 2009

A Tiny Tour: From Crewe to France and Belgium, Day One

Ticket(s) To Ride
Outward Journey Tickets

Back in June this year, Mrs. Monkey had an idea. She thought that, as her Mum was willing to look after the monklets for a week or so, we could do a little holiday on our own. Knowing my enthusiasm for cycling, and having started to ride a bit herself, her suggestion was a small tour of France, or Belgium. Ferry tickets for us plus the bikes were cheap, and the train to Dover and our accomodation/meals would probably be the greatest outlay.

It cemented the idea I'd had for building a slightly more versatile bike than my (wonderful, but racy) Giant SCR2.0, and led to my building up a tourer/commuter on a Surly Long Haul Trucker frame.

Surly Long Haul Trucker - "The Sarge"
"The Sarge" Sans Luggage and Bottle Cages/Pump

I also began to ask around on Cycle-Chat for ideas for a short (5 days, 30-40 miles per day) tour in northern France or Belgium. Eventually, we settled on an itinerary of;

Day One: Crewe - Veurne
Day Two: Veurne - Brugge
Day Three: Brugge - Ieper
Day Four: Ieper - Hondschoote
Day Five: Hondschoote - Crewe

Day One
Expanding on the potted version above, this day consisted of a ride from home to Crewe Station (about 2 miles), a train journey to London Euston, a bike journey across London to Victoria station (you can't take bikes on that part of the tube), a train from Victoria to Dover Priory, and then another short bike ride to Dover Ferry port. From there, we'd travel to Dunkirk by ferry, and then by bike to Veurne.

The journey to Crewe isn't so different to the one I do every day (as I catch the train part way to work from the station anyway). We'd readied everything the night before, and so at 6am we set off for Crewe. We arrived in plenty of time to fix the cycle reservation tickets to the bikes, and ask the platform staff where they needed us to be when the train came in (the Pendolinos are L O N G trains, and the bike bit is always at the end you aren't, it seems, if you don't ask).

Once the train came in, the platform staff unlocked the door to the compartment for the bikes, and we stowed them away, securing them with the seatbelt type straps provided. The bike storage area is also used by the train's cleaning crew, although with this being one of the early trains, it wasn't too cluttered on our journey. The journey to London Euston was pleasant and uneventful - we let the train manager know that we had bikes aboard (so she could arrange for the storage compartment to be unlocked at Euston) and enjoyed a few STRONG coffees.

We'd printed a route from Transport for London's journey planner for the ride to Victoria, although coming out of the station on to Euston road was pretty disorientating, and we lost our bearings and a fair bit of time trying to figure out where we were in relation to the route again. Shouted requests for directions, and some quick riding got us to Victoria with 5 minutes to spare before the Dover train left - fumbling for the tickets at the ticket barrier before we got onto the platform (I made sure to keep them in the front pocket of my handlebar bag for the journey back). Although it was all a bit frantic, cycling through London was a great experience - loads of other bikes around, and drivers for the most part aware of them and considerate (on this journey at least - I'll mention a bit more regarding cabbies in Day 5's write up).

We stowed the bikes as best we could on the Dover train - these trains are a slightly odd design, with room to stow one bike straight along one side, and one or two diagonally across one side of the carriage without blocking the aisle. The Northern Rail coaches I use day to day seem to me a better design, but in common with most of Northern Rail's staff, the staff on the Dover train were friendly and helpful. We'd not been on the train long when we discovered, from an announcement over the train's PA that the carriages would split at Faversham - unfortunately for us, we had ended up in the part heading for Ramsgate, not Dover. The conductor on the train told us not to worry, and simply to change carriages at Faversham (he had to himself, as he was staffing the Dover journey too).

Once at Dover, we cycled the short distance to the port and checked in. On the ferry, we stowed the bikes on two of about five "Sheffield" type stands towards the end of the boat's lorry deck. One of the crew helped us secure them with ropes on the stands. With hindsight, I wished we'd locked the bikes too, as I spent most of the journey to Dunkirk worrying about them being stuck in a van and spirited off (Mrs. Monkey is a trusting soul, and thought I was just being silly).

On docking at Dunkirk (and finding the bikes still where we'd left them) we had the unpleasant surprise of finding that our map didn't include the ferry port, starting at Saint Pol Sur Mer, rather than Loon Plage and the car ferry. We'd not realised this, as the map did have a harbour on it, just not the harbour we'd arrived at! After a quick discussion, we decided to go left at the roundabout at the end of the ferry port's exit road, and strike out straight on until we could pick up the map again. This stretch of road is probably the worst part of the whole of the tour on the French side of the channel. The drivers are far more considerate than we found them to be in Dover, and much less impatient, but there's little escaping the fact that you're effectively riding on a fast dual carriageway with little more than industrial units and scrubland around you.

We were able to get directions in Grande Synthe, from a very nice lady who came over to help when she saw us poring over our map. At this point, we weren't too far from the start of the map so picked up a route once more heading for the town of Dunkirk, going via Petite Synthe.

I have to admit to not knowing quite how far we followed the N1 for - Mrs Monkey spotted a sign for Veurne, and took the turning, not realising that it was a sign for Veurne via the autoroute, which, obviously, we could not follow by bike. (Looking at the map, I think it was either the "Route Du Pont", or the D302(?) heading towards Melhoeck and Ghyvelde).

En Route
Mrs. Monkey Strikes out for Melhoeck's Centre Ville

We picked up the Rue De La Frontierre, and decided on a more direct route through Cabour than following Mearestraat. This followed a road called "Cabourweg", which, unfortunately, turned out to be covered in a fine, silt like sand. Riding through this tended to either have the wheels of the bike slip alarmingly, or bog down as they sank spoke deep into the soft surface - we walked the bikes much of the way until we could rejoin a paved road. After our turn off the N1, however, we'd begun to see more of what we'd come on this tour for - woods and countryside, and small, picturesque towns.

Nearly There
Me at the outskirts of Veurne

After around three hours of riding, we reached our destination, the town of Veurne. The town has a circular road running around it enclosing the centre and the Grote Markt. Riding in on this, we stopped to look at the town map placed on one side of the road in order to find our way to the B&B we were due to stay in. Having done that, and looked up from the town plan, I saw the sign for the hotel (Chez Gaston) just 50 metres or so ahead of us, a welcome sight indeed after our long journey!

Chez Gaston is, I would say, well situated - I like places that are easy to find after a day that started at 6am! Joking apart, it's close to the Grote Markt, and the beginning of the Veurne - Brugge canal, which is a great way to cycle to Brugge. Bike storage is outside, in the owner's locked and enclosed garden. The room we had was large, with a shared bathroom (although no one was staying in the other room sharing it when we were there) and we found the owner friendly and helpful without being imposing. That night we ate a hearty meal at the Taverne Flandria (pasta all round) on the Grote Markt, and looked forward to the following day's trip to Brugge.

Tuesday, August 11, 2009

My Wheelbuilding Adventure, Part the First

My knees and a partially laced wheel.

Disclaimer: This article describes how I chose to do a particular task. It is presented as information, not recommendation - use your own discretion to decide whether my method suits you. If in doubt as to your capabilities, use your local bike shop.

Wheelbuilding is one of those tasks that makes people draw in breath through their teeth - as close to magic as anything in cycling, the mystique of the wheelbuilder is powerful indeed.

So can a small, slightly mechanically adept monkey turn his hand to this most occult of bicycle tasks?

The Specification.
The wheels are for a fat tyred road bike - in my case this means a rear hub with 135mm OLD (over locknut distance, or rear spacing), a fairly wide rim to accomodate tyres up to 45mm (unlikely that I'll run anything that fat, but it's a possibility, even with mudguards on the Surly Long Haul Trucker frame). The bike is intended to be a load hauler, commuter, and occasionally a tourer. In terms of wheels, for me this means high spoke count (36), traditionally (i.e. 3 cross) laced wheels. Wheel size is 700c.

The Components.
Mavic A319 rims (double eyeletted, 700c), tyre sizes 28mm to 47mm, 36 hole.

Shimano Deore M530 hubs (36 hole - irritatingly supplied mismatched (one silver, one black) - original supplier wouldn't respond, and it seems the silver is hard to get. Time is short on this build for reasons I won't go into, so my hubs will be mismatched. Oh well).

ACI Double butted Spokes - 36 x 294mm for front wheel, 18 x 290mm (drive side), 18 x 292mm (non-drive side). Edit: I think 292mm would be better for the front wheel (damn you, DT Swiss spoke calculator).

The Tools.
My truing stand is built from scrap timber (from kitchen cabinets, as it goes) according to the plans in Roger Musson's Wheelbuilding book (of which, more later).

I use a Spokey Red as a spoke wrench.

I lashed out on an adjustable nipple driver - Musson's book does have plans for making your own from a cheap philips head screwdriver. I don't have the means to grind one of these down, and quite liked the idea of the variable length pin on the Cyclus tool I bought - it has proved handy so far. The plus of using the nipple driver is that you get a guaranteed level of "screwed in-ness" of your spokes and spoke nipples. (This is becasue the central pin of the driver disengages at a given point, e.g. when the top of the spoke is 3mm below the top of the nipple). Some people do this by using the spoke wrench to tighten the nipples to a point where a given amount of thread is showing. Whichever method you use, screwing the nipples to a defined point should mean that, given a true, round rim, you start to take up tension and true from a point where your wheel begins true and round...

As a dishing guage, I use a piece of stiff cardboard (from a box that Chain Reaction cycles supplied some tyres in) and a steel ruler. Again, plans for this can be found in Roger Musson's book. I do intend to build the wooden guage also in the book at some point, but the cardboard one works just fine for now (and has the plus of being very quick to make).

Part Two - the method, information used & thoughts on the process itself.

Sunday, August 9, 2009

Bike Maintenance - Bottom Bracket Removal

Disclaimer: This article describes how I chose to do a particular task. It is presented as information, not recommendation - use your own discretion to decide whether my method suits you. If in doubt as to your capabilities, use your local bike shop.

My BB Removal kit - L-R: Crankbolt and washers, outside tap nut, Cyclo Bottom Bracket tool (shimano compatible).

The time had come to change the Truvativ square taper bottom bracket on my Giant SCR2.0. I had confidence that the bottom bracket (hereafter "bb") had been installed properly, as my bike was supplied by Rick Green's of Handforth, an excellent bike shop. (This is significant - poorly fitted bbs can "cold weld" into frames and become a large headache).

Before I started, I made sure I knew what thread my bb was. This is important, as "English" threaded bb cups loosen in different directions, depending which side of the bike you are working on. Not knowing the threading of your bb could mean you spending a day leaning on the spanner, getting nowhere and developing ever more inventive combinations of swear words to throw at your bicycle. As my bb shell on the Giant is English threaded, the tool must be rotated towards the front of the bike to loosen (clockwise on the drive side, anti clockwise on the non drive side). If this seems counter intuitive, it's because the tightening action thought to result from pedalling is the effect of the bearings on the bb cups, not on the cups directly. I think.

My first attempts were made using the tools from my Lidl bike tool set (a shimano splined BB tool with tall splines, that uses an 8mm allen key to turn it). The problem with this tool is that it has no way to hold itself into the splines on the BB. A properly fitted BB will be in the shell plenty tight, so without gorilla like grip, you'll struggle to hold the tool in place while applying the large amount of torque required to move the BB - at worst, you can damage the splines as the tool loses engagement. Pictured above is my bottom bracket removal kit, based on advice from my local bike shop, Manchester's excellent Bike Boutique. They suggest the use of a tool with shorter splines (measured vertically from top to bottom of the tool), a bolt the right size for the crank bolt hole in the bb spindle, and a large washer (usually sold in hardware stores as a "repair" washer).

My kit differs slightly, in that I used bits from around the garage - the bolt is the bolt from the square taper crankset that was originally on this bb, and instead of a repair washer I used the nut from an old outside tap kit (the washer and cap on the crank bolt are large enough to hold this securely).

The bolt and washer are used to hold the tool on to the bb cup, as pictured below;

End on view - the tool is held in place by the nut, which has been bolted through to the bb's spindle.

Another view showing the whole stack.

Remember that the purpose of the stack is to hold the tool in place so that it doesn't slip on the splines - it doesn't have to be hugely tight (you don't want to be working against it when turning your wrench). One advantage of the stack I used (as opposed to the repair washer) is that it doesn't overlap the wrench flats of the bb tool. I guess (although I didn't use one myself) this would make the use of a ring spanner or socket wrench possible. (On the cyclo tool, the wrench flats are 32mm in size, incidentally).

Once the tool is bolted in place, use a suitable spanner to turn the bb tool. On my bb, the drive side was movable using a headset wrench. Unfortunately, the non-drive side was far too tight for this to work, so I invested in a good quality 10" adjustable wrench to remove this side. Even here, a fair amount of force had to be applied to "break" the first turn- in my case applied with a rubber mallet to the end of the wrench - I'm not sure I'd recommend that approach to you, although I used "taps" of hopefully gradually increasing force.

As with lots of bike jobs, once I had the correct tools, and a bit of advice, the whole process was pretty straightforward. The Giant had its bb shell cleaned out, regreased heavily, and now sports a Hollowtech II bb and a Tiagra crankset. The old square taper crankset (with a lovely new FSA outer ring) will be used on my Long Haul Trucker build, once a replacement square taper bb arrives (the Truvativ one originally in the Giant is a bit gritty, so will not be reused).

Tuesday, August 4, 2009

Le Tour, Classifieds

I've often heard it said that pro-cycling teams sell some of their kit at the end of the season, as a way of raising funds and divesting themselves of unused bikes and parts.

Obviously the Tour de France doesn't mark the end of the season, but we found these interesting little snippets in the classifieds section of a little known cycling magazine.

(Or we strung together a lot of tenuous in jokes as an excuse to put another post up without doing too much work).

ITEMS OFFERED:
Team Astana Rider Trading Cards.
Complete Set Available, Happy to Split.
Contact: J. Bruyneel.

"Win Friends and Influence People" Book (French Edition).
Unread.
Contact: B. Hinault.

"It's a Family Affair" - Sly and the Family Stone (CD)
Contact: A. Schleck

"O Brother Where Art Thou?" DVD
Contact: B. Feilliu

"Tales of the Unexpected" DVD box set
2009 Italian and French editions available.
Contact: B. Wiggins.

"Nice Guys Finish Last" book.
Contact: K. Van Hummel

Stage Winner T-Shirt - Euskatel Euskadi Colours.
Medical Condition forces sale.
Contact: M. Astarloza

ITEMS WANTED:
Mountain/All Terrain Bikes (x9)
Can exchange for 9 slightly dirty Time Trial Bikes.
Contact: BBox Bouygues Telecom Team HQ.

Complete Team Kit.
Most pro-tour considered, Not Astana please.
Contact: A. Contador.

Stabilisers / Training Wheels, or Racing Trike.
Cash offered, or can offer exchange/part exchange (can offer road bike, tt bike (with torn handlebar tape and some scrapes from use) or several pairs of bib shorts (torn)).
Contact: D. Menchov

CREDIT WHERE CREDIT IS DUE:
Entire post inspired by a joke I saw on twitter about Denis Menchov offering several pairs of scraped up Rabobank bibshorts for sale.

Saturday, August 1, 2009

What Will You Do, Jim?

I picked this book up on a recent trip to Devon. It's been my pleasure, on such occasions, to visit a great little book shop on Station Road, Teignmouth.

The owners of the shop had, as their interests, both rock climbing and cycling. The cycling section of the shop was my destination, and however little I might think it able to offer me after previous visits, I'd inevitably leave at least £20 poorer, and several books richer.

It was at Teignmouth Books that I picked up William Fotheringham's "Put Me Back on my Bike", and Freddy Maertens' autobiography, for instance. (I also bought Lance Armstrong's two books, but I won't hold "Every Second Counts" aganst them). The shop is a treasure trove, full of interesting tomes, some devoted to subjects as specific as space-frame Moultons, and some as wide ranging as studies of the bicycle in "War, Love, Life and Literature" (S. McGonagle), some rare as hen's teeth, some as ubiquitous as "It's Not About the Bike". (Few people know that by law, there must be at least one copy of "It's Not About the Bike" in every book shop's "Cycling" shelf - shopkeepers found guilty of breaking this law are made to read the English translation of "A Tempered Passion", the Indurain biography. Cruel and unsual indeed).

Sadly, it seems, the shop is to close - despite my best efforts to empty their shelves, fill mine, and fill their coffers, it seems that they're unable to keep going in the present climate. The proprietor was kind enough to point me in the direction of the book whose cover adorns this post. I know nothing about it, or the author, but am a sucker for a striking cover, it must be said. A couple of touring books (one from the '60s, one from the early '90s), a Graham Watson coffee table book "Heroes of the Tour", a training guide from 1975, and the McGonagle book I mentioned completed my purchases.

If any of you are heading over Teignmouth way soon, you'll find that I've left some books there for you still. Have a browse, buy something interesting - if you've the money, that history of Spaceframe Moultons looked really interesting...