Thursday, October 15, 2009

Exciting Things

Exciting Thing No.1
The new Ragley Rodwell frame - I'm not sure why I'm excited about this, as the chances of my building one up are next to zero. I love the idea behind the frame though, and the attention to detail on it (see the designer's flickr stream for more, here).

The roller above the chainstay bridge allows a bottom pull mech (i.e. a road mech) to be used with the bike's top tube cable routing. The headset mounted cable hanger is also a thing of great beauty, although my personal feeling is that fork crown mounted hangers work better unless you have your bars set up pretty high.

These frames look like they'll build into really nice fat tyred road bikes - ideal for someone wanting to go in that direction but not take the Tourer route that I took with my Surly LHT.

Exciting Thing #2
Regular readers (ha!) may remember my dithering over a folding bike earlier in the year. I finally got a chance to test ride a Brompton last week (an S6L, in case you're wondering) and was impressed by it. Far less twitchy than I'd expected, and a lot of fun to throw around the car park near the bike shop where the test ride took place.

I've decided on an S3L (I do live in Cheshire, after all, so six gears seems like overkill) with a "C" bag as luggage. The bike is being purchased via cyclescheme, and I found out recently that my voucher application has been approved. I have that new bike feeling all over again...

Thursday, October 1, 2009

Mine's a Priscilla *BROOKS UPDATE!*

Brooks B17 Champion Standard #1
My New Secondhand B-17

As twittered a day or so ago, I made a recent impulse purchase of a used B-17 "Champion Standard" saddle. Having looked at the various ways of pressing a modern (bag loop-less) saddle into carrying a traditional Carradice saddlebag, it occurred to me that the weight of such an arrangement wouldn't be far off that of a Brooks. Buying second hand meant that the cost wasn't vastly different either.

Before I knew it, the eBay purchase was made, and the saddle arrived yesterday. Condition is pretty much ok, a bit scruffy, with some scuffs, but its probably a better option for me than paying £50+ on a new saddle for the purposes of trying out a Brooks. I'm one ride in, and starting to believe the hype about these saddles - although (obviously) the sit bone depressions are someone elses, the comfort is immediately apparent. It's quite different to the comfort offered by (say) an Arione, because of the movement in the top of the Brooks. The bag loops are a hugely better solution for the straps of the Carradice too.

I'm hoping that I get on with this saddle, as going back to the zipties to secure the bag doesn't seem very appealing at this point.

Brooks & Carradice Lowsaddle
My New Secondhand B-17, with the Carradice Lowsaddle Mounted

I'm wondering quite where this slippery slope will take me next. Touring Bike, Carradice, Brooks Saddle. Are SPD sandals and a beard and pipe now unavoidable?

Tuesday, September 29, 2009

Other Business


Just a quick update regarding the "To be continued..." posts left hanging recently (namely, The Tiny Tour and My Wheel Building Adventure ).

They're not forgotten, but the image files I need to complete them are on a PC that is currently disassembled and in the cellar while its usual home is decorated. Once that's done, I'll complete those particular stories.

Mine's a Priscilla

On the Bike, Dog in Attendance
My Carradice Lowsaddle Longflap, on the bike with a happy dog in attendance.

My Carradice Bag, that is. Inside, on the label, is written the name of the person who made the bag, in my case, Priscilla. The desire for an old fashioned saddlebag for my commuting bike grew out of the realisation that my panniers were a less than ideal solution. Using two results in a bike that's hard to manoeuvre on and off the train (and with panniers barely half full). Using one results in a bike that handles oddly - not unrideable, but I didn't like it.

The solution seemed to me to carry the load centrally on the back of the bike. Given that my panniers are 20l capacity each, I figured a 10-15l saddlebag would provide enough space for most of my commutes.

I'd discounted rack bags because they tend to top out around the 10l mark in capacity, and I have to admit that I liked the idea of a traditional, British made product like the Carradice saddlebags for a bike like my Long Haul Trucker - the ethos seemed to fit, to me.

I considered the Carradice Barley for a little while (often recommended as a commuting/day ride solution) but worried about the days I'd need to carry a bit extra. (Good job, as it turned out, the Barley would have been way too small for me).

My eventual choice was the Nelson Longflap, and I asked my local bike shop (Manchester's Bicycle Boutique) to order one for me.

An ordering mix up meant that I actually ended up with the Lowsaddle Longflap (similar dimensions to the Nelson, but slightly less high to account for bikes with less clearance between saddle and tyre/mudguard/rack). This turned out to be something of a happy accident, as the bag rests nicely on my rear rack.

On the Bike #1
On the bike, using the "Longflap" closure - this allows the carriage of slightly more stuff.

So how did it manage with a typical commute's luggage?

Bag Interior, Packed For Regular Closure
Packed for a normal commute - will be closed without the longflap

The picture above shows the interior of the bag. This is what I'd carry most days - a book to read on the train, moleskine pocket notebook and diary, and work clothes. The space left is where I'd put my lunch most days, and the bag liner is the bag that the Lowsaddle saddlebag came in (handy that). With all this in the bag, it can be closed using the "normal" closure without problems.

On the Bike, Regular Closure
Packed for a normal commute and mounted on the bike - closed without the longflap here

There isn't room for my waterproof in the bag (actually, there probably would be if I laid it on top of the contents and did up the flap over it. Hmm). In the pictures it's secured to D rings on the top of the bag using toe clip straps - I think it provides a helpful bit of extra "hi vis" for following traffic, by coincidence. The light loop on the flap is occupied by a Torch9x light which has an integral reflector. (It supplements a rack mounted Smart Superflash light for rear visibility). With the bag hanging at its natural angle, the light faces rearward in just the right position. (I believe some people press the nice metal Carradice plaque into service for light mounting where the angle of the bag is not right for the light loop to be effective).

Right Hand Pocket
Right Hand Pocket

Outside the main body of the bag are two side pockets. Carradice lore suggests that these will spill small items (because of the flap closure, and angle of the bag). In the right hand pocket, I have a spare inner tube (Continental Touring 28-35, from memory, fact fans) and a Rema Tip Top touring puncture repair kit. Both fit nicely, and are large enough not to unexpectedly depart the bag.

Left Hand Pocket
Left Hand Pocket

In the left hand pocket is a Bagaboo tool pouch - this holds another puncture repair kit, tyre levers, my multi-tool, cable ties, chain quick link &c &c. The bagaboo pouch is a tight-ish fit, but not so much as to be awkward. My pouch is the truck tarp version, so should be waterproof enough to survive this location in a downpour. (The cotton duck material of the saddle bag is waterproof due to its close weave and proofing wax, but can transfer moisture from its internal surface, apparently).

What about when I needed to carry more? It's here that the "Longflap" closure comes into play. Essentially this is a piece of extra material that tucks under the flap used for the "normal" closure of the bag (when not in use, it's held in place by press-studs). It sports an extra set of straps for closing the bag over a larger load.

Bag Interior, Packed for Longflap Use
Bag Interior - Packed for use with the "Longflap"

As shown above, the bag has an 800g sliced Rye loaf, work shirt & underwear, paperback (H.P. Lovecraft's "Haunter in the Dark" omnibus), lunch box, moleskine pocket notebook and diary inside.

On the Bike #1
on the bike, closed using the "Longflap"

The photo above shows how the longflap closure looks on the bike - notice how it makes the bag slightly taller. The photo at the start of this post shows a rear view, and a clearer view of the extra straps on the longflap in use. The drawstring closure inside the bag is large enough to cope with the bigger load too, meaning that it isn't exposed at the sides.

The only thing I'm less than happy about at present is my mounting solution for the bag. I've gone with the infinitely useful cable tie, for the time being.

On the Bike, Cable Tie Bodge
Cable Ties for Saddle Loops

The cable ties go around the saddle rails, and the bag straps go through these (buckles inside the bag, as any fule kno). Despite this giving the saddle a whimsical, whiskery look (a bit like a cartoon mouse), I suspect the edges of the ties will not be good for the leather bag straps, so will be looking to change this mounting method fairly soon. (There's tons of ways to do this, from the fettling heaven of Carradice hackery, to the clamps and racks and bits supplied by Carradice themselves).

I love the bag so far - build quality is great, and it seems, up to now, to be ideal for my purposes. It isn't terrific on the Arione saddle, because the back of the saddle extends a fair way over the bag, but I've not had problems accessing or repacking my stuff that outweigh the positives of it. (The inconvenience amounts to reaching slightly further into the bag under the top flap - not too onerous). The feel of the bike is far, far better than with my old, single pannier solution too.

Useful Links:
Carradice Website
Wallbike's Carradice Hacks
Peter White Cycles' Carradice Page (far better pictures than on Carradice's Website, and lots of useful information).

Monday, August 31, 2009

A Tiny Tour: From Crewe to France and Belgium, Day Two

Mrs Monkey at the Start of the Route #2
Mrs. Monkey at the outskirts of Veurne

During the night, the slight disadvantage of a hotel on the road around Veurne became apparent. In Belgium, it seems, people discuss parking their BMW X5s in tiny spaces in VERY loud voices at midnight. Garbage collection is also done by VERY noisy trucks during the wee small hours of the morning. Closing the window largely resolved the noise problem though.

Westhoek Kajakclub
Westhoek Kajakclub, where we joined the canal side route out of Veurne

Our plan for today was to strike out towards Brugge, using the route along the Canals (Kanal Veurne Nieuwpoort, Kanal Passendale-Nieuwpoort, Kanal Gent-Brugge-Oostende). Navigation from this point was straightforward, using the excellent system of "knoppunkten". Rather signpost numbered routes, a la the NCN in Britain, the Fietsroute system in Belgium employs a series of numbered points. Using your map, you decide which points to follow to your destination, and then just follow the signs between them. The signs are intelligently placed and easily interpreted. It's a system that works superbly, and both Mrs. Monkey and I became big fans of it during our tour.

Mrs Monkey and Friends
Traffic on the Fietsroute

As you'll see from the pictures, the day began a little overcast, and we did get a shower around midday that was heavy enough to require 5 minutes or so sheltering under a tree. Along the way out of Veurne, we encountered these sheep, and this unusual path side tableau;

A Pathside Tableau
Flat Eric has a Deadline to Meet

We also saw a pedal pub, although this was, unfortunately, on the other side of the canal to us, we couldn't take up the occupants' enthusiastic offers of drinks! Another sight we saw for the first time along this part of the route was the large, guided rides that seem to be an everyday occurrence. I'd estimate that about 20-30 people, mostly seeming to be in their 60s, led by three or four people in Hi-Viz tabards were headed towards Veurne along the fietsroute. We were to see these groups pretty much every day, along with training racing cyclists, and commuters (the latter more common the closer we were to towns).

On the Veurne - Brugge Canal
Me, where the route turns towards Brugge

After turning towards Snaskerke and Oudenburg, the day began to brighten, and we stopped just over one of the bridges on the canal at the "Bistro Nieuwweg" ("New Way Bistro"). I don't think we'd have spotted this place had we not been cycling (it's seriously out of the way).

Bikes
Our Bikes at the Bistro...

Parking
And Our Bikes in context.

As you can see from the pictures, most of the other patrons had arrived by bike too - generally (and the folks at Amsterdamize/Copenhagenize would be proud) on city bikes, helmetless, in "normal" clothes. Here, the bikes outnumbered the parked cars by around three to one. Had another guided group stopped (one passed as we were enjoying a Kriek and a Hoegaarden) that would have risen to ten to one. You can also see our first taste of Belgian pavé here. We were to become more familiar with this on day three...

Oudenburg

We did make a stop in Oudenburg, but found that a lot of places had already closed. We stopped at a quite swanky restaurant, and felt so out of place among the suited clientele that we left having only had a drink. Eventually, we happened across a small bakery, and I used my (frankly limited and dreadful) Dutch to order us a couple of sandwiches (which were delicious, although I couldn't figure out what was in them) and pastries to sustain us for the rest of the journey.

Arrival at Brugge
Arrival at Brugge

If I look somewhat uncomfortable in the picture above, it may be because I'm trying not to stand in the trash surrounding the foot of this sign. Once in Brugge, we used my Nokia N82's GPS navigation system to find where we were staying, the B&B Marie Rose Debruyne, on Langeraamstraat. This is a really well situated B&B, handy for the centre of Bruges, and run by lovely, friendly people. (As we left, they were 'phoning the train station at Zeebrugge to find out for another guest whether left luggage lockers were available). The house was designed by the proprietor, and is unusual architecturally, but comfortable and friendly (super breakfast too). One word of warning is that the numbering on this road is slightly confusing - you may need to use your (frankly limited, and dreadful) Dutch to get directions.

Grote Markt, Brugge
Brugge Grote Markt.

Brugge itself is wonderful, and bikes are EVERYWHERE. The "Uitgezonderd" exceptions for bicycles and mopeds to the one way system are ubiquitous, and the world has not stopped turning, nor does there seem to be the daily carnage that opponents to such systems seem to predict. As you can probably see from the pictures, the evening we were there was lovely, sunny and warm.

Horse Drawn Carriages, Brugge
The ubiquitous Horse Drawn Carriages...

Brugge Bike
...and even more ubiquitous bikes.

Dinner on this night was in a "Tante Marie" restaurant just off the Grote Markt. More pasta for Mrs Monkey, although I tried a Vlamse Karbonade (Flemish Stew) which was very tasty indeed.

Miles Covered: 34, at an average speed of 10.18mph

Sunday, August 30, 2009

A Tiny Tour: From Crewe to France and Belgium, Day One

Ticket(s) To Ride
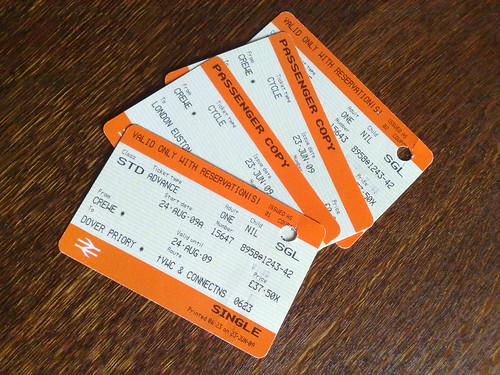
Outward Journey Tickets

Back in June this year, Mrs. Monkey had an idea. She thought that, as her Mum was willing to look after the monklets for a week or so, we could do a little holiday on our own. Knowing my enthusiasm for cycling, and having started to ride a bit herself, her suggestion was a small tour of France, or Belgium. Ferry tickets for us plus the bikes were cheap, and the train to Dover and our accomodation/meals would probably be the greatest outlay.

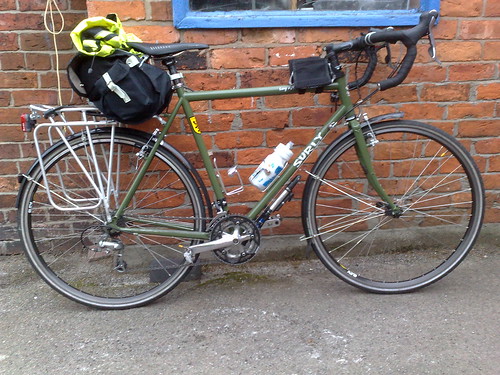
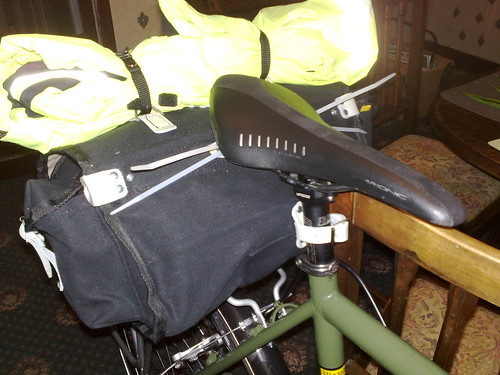
It cemented the idea I'd had for building a slightly more versatile bike than my (wonderful, but racy) Giant SCR2.0, and led to my building up a tourer/commuter on a Surly Long Haul Trucker frame.

Surly Long Haul Trucker - "The Sarge"
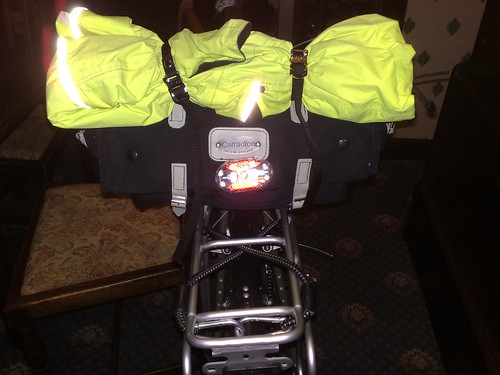
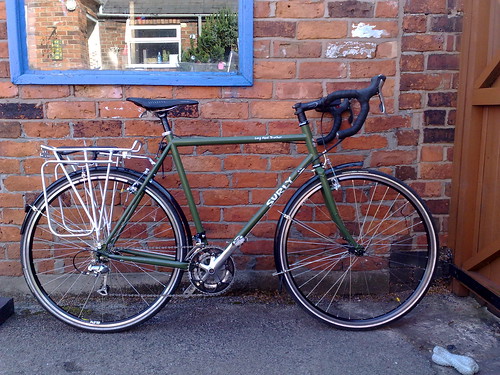
"The Sarge" Sans Luggage and Bottle Cages/Pump

I also began to ask around on Cycle-Chat for ideas for a short (5 days, 30-40 miles per day) tour in northern France or Belgium. Eventually, we settled on an itinerary of;

Day One: Crewe - Veurne
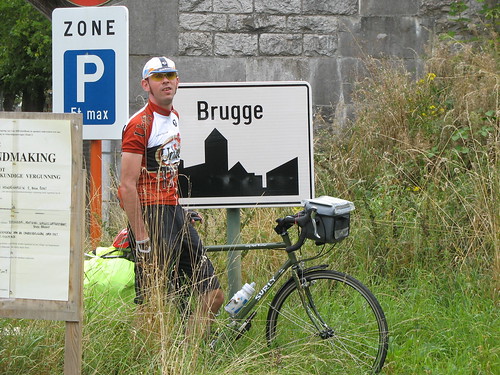
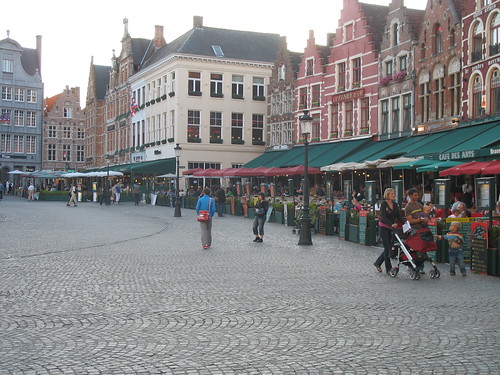
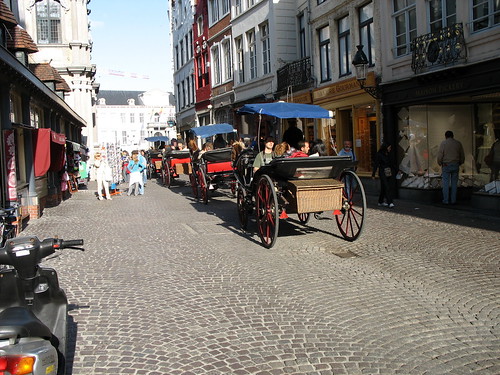
Day Two: Veurne - Brugge
Day Three: Brugge - Ieper
Day Four: Ieper - Hondschoote
Day Five: Hondschoote - Crewe

Day One
Expanding on the potted version above, this day consisted of a ride from home to Crewe Station (about 2 miles), a train journey to London Euston, a bike journey across London to Victoria station (you can't take bikes on that part of the tube), a train from Victoria to Dover Priory, and then another short bike ride to Dover Ferry port. From there, we'd travel to Dunkirk by ferry, and then by bike to Veurne.

The journey to Crewe isn't so different to the one I do every day (as I catch the train part way to work from the station anyway). We'd readied everything the night before, and so at 6am we set off for Crewe. We arrived in plenty of time to fix the cycle reservation tickets to the bikes, and ask the platform staff where they needed us to be when the train came in (the Pendolinos are L O N G trains, and the bike bit is always at the end you aren't, it seems, if you don't ask).

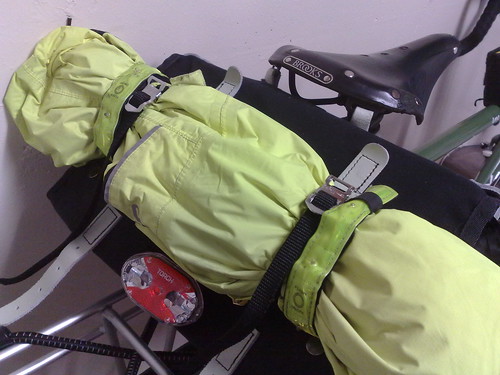
Once the train came in, the platform staff unlocked the door to the compartment for the bikes, and we stowed them away, securing them with the seatbelt type straps provided. The bike storage area is also used by the train's cleaning crew, although with this being one of the early trains, it wasn't too cluttered on our journey. The journey to London Euston was pleasant and uneventful - we let the train manager know that we had bikes aboard (so she could arrange for the storage compartment to be unlocked at Euston) and enjoyed a few STRONG coffees.

We'd printed a route from Transport for London's journey planner for the ride to Victoria, although coming out of the station on to Euston road was pretty disorientating, and we lost our bearings and a fair bit of time trying to figure out where we were in relation to the route again. Shouted requests for directions, and some quick riding got us to Victoria with 5 minutes to spare before the Dover train left - fumbling for the tickets at the ticket barrier before we got onto the platform (I made sure to keep them in the front pocket of my handlebar bag for the journey back). Although it was all a bit frantic, cycling through London was a great experience - loads of other bikes around, and drivers for the most part aware of them and considerate (on this journey at least - I'll mention a bit more regarding cabbies in Day 5's write up).

We stowed the bikes as best we could on the Dover train - these trains are a slightly odd design, with room to stow one bike straight along one side, and one or two diagonally across one side of the carriage without blocking the aisle. The Northern Rail coaches I use day to day seem to me a better design, but in common with most of Northern Rail's staff, the staff on the Dover train were friendly and helpful. We'd not been on the train long when we discovered, from an announcement over the train's PA that the carriages would split at Faversham - unfortunately for us, we had ended up in the part heading for Ramsgate, not Dover. The conductor on the train told us not to worry, and simply to change carriages at Faversham (he had to himself, as he was staffing the Dover journey too).

Once at Dover, we cycled the short distance to the port and checked in. On the ferry, we stowed the bikes on two of about five "Sheffield" type stands towards the end of the boat's lorry deck. One of the crew helped us secure them with ropes on the stands. With hindsight, I wished we'd locked the bikes too, as I spent most of the journey to Dunkirk worrying about them being stuck in a van and spirited off (Mrs. Monkey is a trusting soul, and thought I was just being silly).

On docking at Dunkirk (and finding the bikes still where we'd left them) we had the unpleasant surprise of finding that our map didn't include the ferry port, starting at Saint Pol Sur Mer, rather than Loon Plage and the car ferry. We'd not realised this, as the map did have a harbour on it, just not the harbour we'd arrived at! After a quick discussion, we decided to go left at the roundabout at the end of the ferry port's exit road, and strike out straight on until we could pick up the map again. This stretch of road is probably the worst part of the whole of the tour on the French side of the channel. The drivers are far more considerate than we found them to be in Dover, and much less impatient, but there's little escaping the fact that you're effectively riding on a fast dual carriageway with little more than industrial units and scrubland around you.

We were able to get directions in Grande Synthe, from a very nice lady who came over to help when she saw us poring over our map. At this point, we weren't too far from the start of the map so picked up a route once more heading for the town of Dunkirk, going via Petite Synthe.

I have to admit to not knowing quite how far we followed the N1 for - Mrs Monkey spotted a sign for Veurne, and took the turning, not realising that it was a sign for Veurne via the autoroute, which, obviously, we could not follow by bike. (Looking at the map, I think it was either the "Route Du Pont", or the D302(?) heading towards Melhoeck and Ghyvelde).

En Route
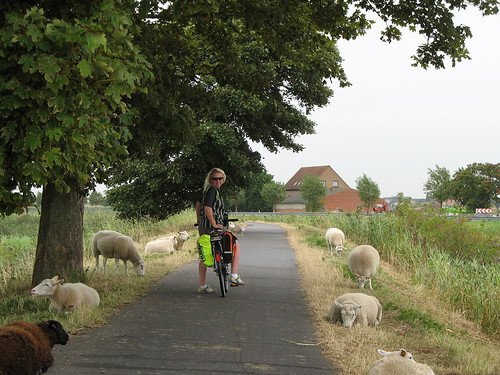
Mrs. Monkey Strikes out for Melhoeck's Centre Ville

We picked up the Rue De La Frontierre, and decided on a more direct route through Cabour than following Mearestraat. This followed a road called "Cabourweg", which, unfortunately, turned out to be covered in a fine, silt like sand. Riding through this tended to either have the wheels of the bike slip alarmingly, or bog down as they sank spoke deep into the soft surface - we walked the bikes much of the way until we could rejoin a paved road. After our turn off the N1, however, we'd begun to see more of what we'd come on this tour for - woods and countryside, and small, picturesque towns.

Nearly There
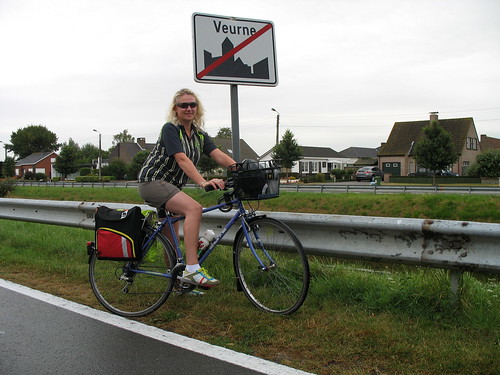
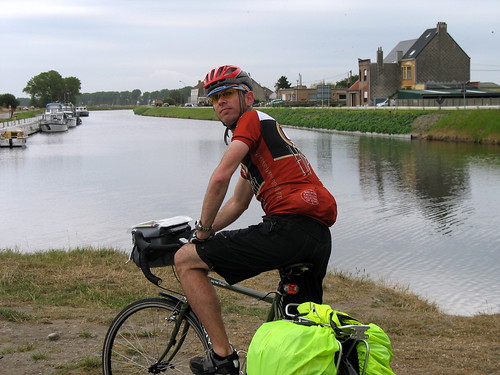
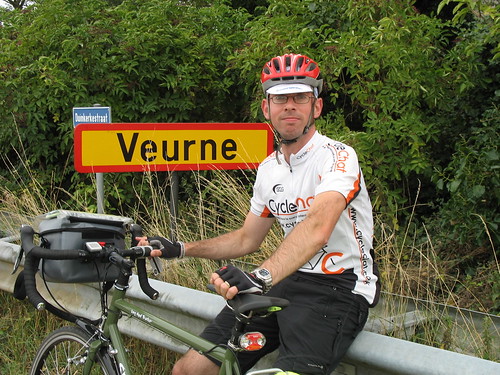
Me at the outskirts of Veurne

After around three hours of riding, we reached our destination, the town of Veurne. The town has a circular road running around it enclosing the centre and the Grote Markt. Riding in on this, we stopped to look at the town map placed on one side of the road in order to find our way to the B&B we were due to stay in. Having done that, and looked up from the town plan, I saw the sign for the hotel (Chez Gaston) just 50 metres or so ahead of us, a welcome sight indeed after our long journey!

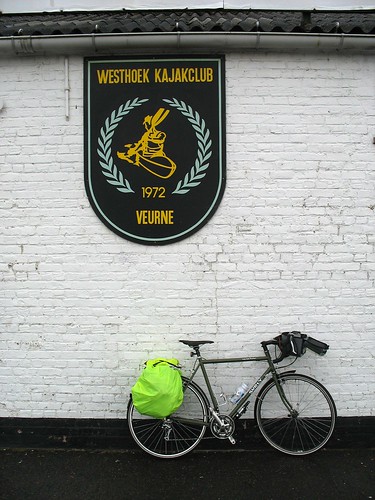
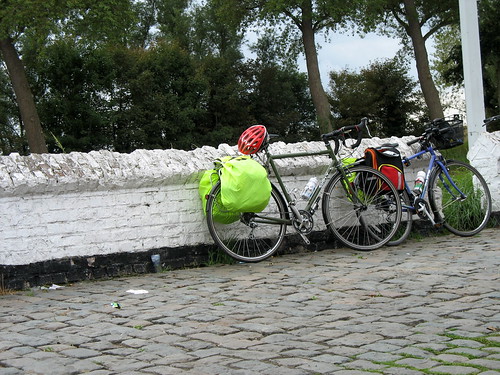
Chez Gaston is, I would say, well situated - I like places that are easy to find after a day that started at 6am! Joking apart, it's close to the Grote Markt, and the beginning of the Veurne - Brugge canal, which is a great way to cycle to Brugge. Bike storage is outside, in the owner's locked and enclosed garden. The room we had was large, with a shared bathroom (although no one was staying in the other room sharing it when we were there) and we found the owner friendly and helpful without being imposing. That night we ate a hearty meal at the Taverne Flandria (pasta all round) on the Grote Markt, and looked forward to the following day's trip to Brugge.

Tuesday, August 11, 2009

My Wheelbuilding Adventure, Part the First

My knees and a partially laced wheel.

Disclaimer: This article describes how I chose to do a particular task. It is presented as information, not recommendation - use your own discretion to decide whether my method suits you. If in doubt as to your capabilities, use your local bike shop.

Wheelbuilding is one of those tasks that makes people draw in breath through their teeth - as close to magic as anything in cycling, the mystique of the wheelbuilder is powerful indeed.

So can a small, slightly mechanically adept monkey turn his hand to this most occult of bicycle tasks?

The Specification.
The wheels are for a fat tyred road bike - in my case this means a rear hub with 135mm OLD (over locknut distance, or rear spacing), a fairly wide rim to accomodate tyres up to 45mm (unlikely that I'll run anything that fat, but it's a possibility, even with mudguards on the Surly Long Haul Trucker frame). The bike is intended to be a load hauler, commuter, and occasionally a tourer. In terms of wheels, for me this means high spoke count (36), traditionally (i.e. 3 cross) laced wheels. Wheel size is 700c.

The Components.
Mavic A319 rims (double eyeletted, 700c), tyre sizes 28mm to 47mm, 36 hole.

Shimano Deore M530 hubs (36 hole - irritatingly supplied mismatched (one silver, one black) - original supplier wouldn't respond, and it seems the silver is hard to get. Time is short on this build for reasons I won't go into, so my hubs will be mismatched. Oh well).

ACI Double butted Spokes - 36 x 294mm for front wheel, 18 x 290mm (drive side), 18 x 292mm (non-drive side). Edit: I think 292mm would be better for the front wheel (damn you, DT Swiss spoke calculator).

The Tools.
My truing stand is built from scrap timber (from kitchen cabinets, as it goes) according to the plans in Roger Musson's Wheelbuilding book (of which, more later).

I use a Spokey Red as a spoke wrench.

I lashed out on an adjustable nipple driver - Musson's book does have plans for making your own from a cheap philips head screwdriver. I don't have the means to grind one of these down, and quite liked the idea of the variable length pin on the Cyclus tool I bought - it has proved handy so far. The plus of using the nipple driver is that you get a guaranteed level of "screwed in-ness" of your spokes and spoke nipples. (This is becasue the central pin of the driver disengages at a given point, e.g. when the top of the spoke is 3mm below the top of the nipple). Some people do this by using the spoke wrench to tighten the nipples to a point where a given amount of thread is showing. Whichever method you use, screwing the nipples to a defined point should mean that, given a true, round rim, you start to take up tension and true from a point where your wheel begins true and round...

As a dishing guage, I use a piece of stiff cardboard (from a box that Chain Reaction cycles supplied some tyres in) and a steel ruler. Again, plans for this can be found in Roger Musson's book. I do intend to build the wooden guage also in the book at some point, but the cardboard one works just fine for now (and has the plus of being very quick to make).

Part Two - the method, information used & thoughts on the process itself.